Each of these steps is detailed after the image.
There are two easy ways to add the files you need to convert to Doxillion:
When a file has been added to Doxillion for conversion, it will appear in the conversion list with a document icon next to it. Once it has been converted, it will remain in the list, and the icon will display a green checkbox on it if the conversion was successful, or a red 'x' if it was unsuccessful
To delete a file from the list, select it by clicking on it and then click the Remove button in the toolbar.
Note that you can add multiple files with different formats to the conversion list, and convert them in one batch.
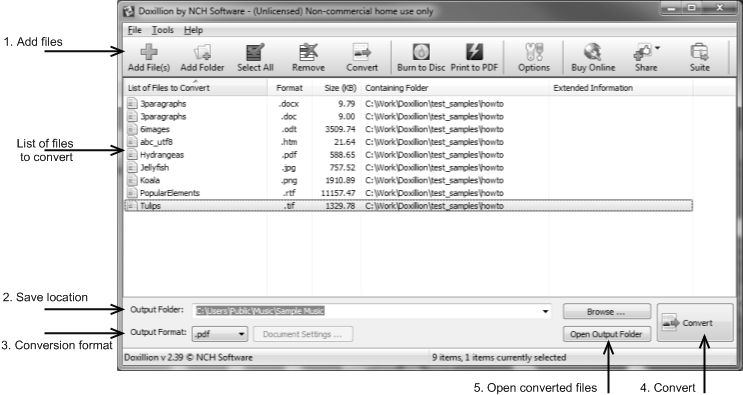
The "Output folder" label displays where the converted files will be saved. By default, it displays the location used from the last session.
The "Output format" label displays the selected format you are converting to. To change the output format, click the output format to open the drop-menu, and select the format you want to convert to.
When you are ready to convert the files in the conversion list to the specified format in the specified location, click the large Convert button in the lower right corner of the main window.
Note that if any of the files in the conversion list are selected, clicking the Convert button will convert only the selected files. To convert the entire list, make sure none of the files are selected. To deselect items, click a portion of the list that does not contain any files for conversion.
After you have clicked the Convert button, to view the converted file, click the Open output folder button located just to the left of the Convert button in the lower right area of the main window. This will open up the location of the most recently converted file(s).