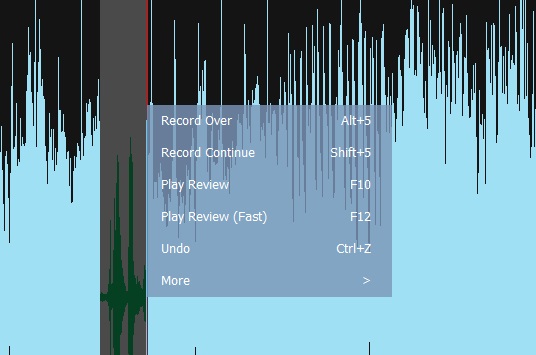
Recording To start recording, press the F5 key, or the Record button. The recording will be made straight into your currently open file, at the position of your cursor. If you have some audio already selected then this will be replaced by your new recording. If you don't have a file open then recording will start in a new file. To adjust recording settings, go to Options > Recording, where you can choose your recording device, adjust recording volume, and turn voice activation and automatic trimming on or off. The recording sample rate will automatically match the sample rate of the current file, unless the recording device doesn't support this sample rate, in which case you will be asked whether to continue the recording at a sample rate that the device does support. The number of channels in a recording (one for Mono, two for Stereo) will also automatically match the current file. Note that when you record in stereo from a device that only supports mono (such as most microphones), then the left and right channels will be identical copies of the mono recording. When you start recording, the 'Scrub' button will turn into a 'Pause' button, and the 'Go to start' button will turn into a 'Retake' button. Press the 'Pause' button to pause recording. You can then resume recording by pressing it or the record button again. When Safe Record is enabled, you can’t click anywhere else in the program except Stop when recording to stop recording. If you try to do anything you will just see a bubble tip on the stop button. This is to prevent accidents. After the recording, a menu will pop up. - "Record Over" replaces the previous recording with a new recording.
- "Record Continue" continues the recording from the cursor.
- "Play Review" plays the recorded region in normal speed.
- "Play Review (Fast)" plays the recorded region in 1.5x speed.
- "Undo" reverts the recording
- "More>" will show other actions that can be performed on the recorded region
Recording Tips: - Placement of microphone! Keep the mic away from computer fans/ambient noise
- Do a test recording before you start
- Record your voice in mono and then convert to stereo after editing/adding effects
- Only ‘Normalize’ once, after all the editing and effects have been added
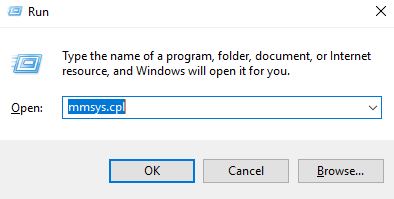
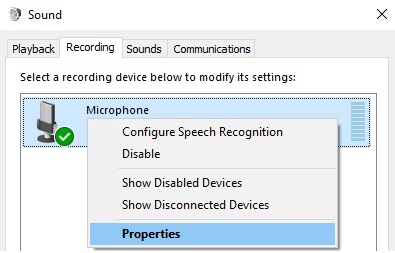
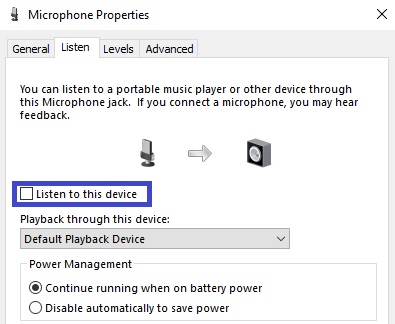
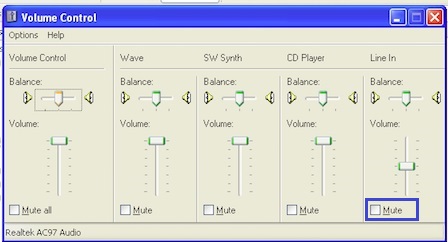
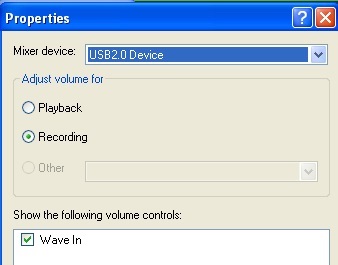
Overdub / Mix Recording (Note: We recommend trying MixPad to record an overlay to mix with another audio file. Mix recording on separate tracks before exporting your audio file provides many advantages.) To overdub/mix record, open your audio file in WavePad. Then, start Overdub/Mix record by pressing Ctrl+Shift+F5 or by going to "Menu" -> "Control" -> "Record" -> "Record – Overdub/Mix". Recording will start immediately at your cursor, you will hear the audio file playing as you record your overdub. When you are finished recording, press stop. If you need to start over, use undo to remove your previous recording, place your cursor at the start position, then start overdub/mix record again using the shortcut keys Ctrl+Shift+F5 or by going to "Menu" -> "Control" -> "Record" -> "Record – Overdub/Mix". Punch and Roll To start punch and roll recording, select a region in the audio file and click "Punch" from the Recording Tab. The audio will start playing 3 seconds before the selected region and start recording. After the duration of the selected region, it will also play 3 seconds after the recording. The playback time can be configured in "Record Options" -> "Punch and Roll Settings". There are different record modes in Punch and Roll Recording (See Punch and Roll Settings). The "Auto" mode chooses between "Fixed" and "Flexible" smartly based on the type of audio we are recording over. The "Fixed" mode automatically stops based on the duration of the selected region. "Fixed" mode is recommended for music audio types. The "Flexible" mode continues recording from the selected region and stops until user decides to. "Flexible" mode is recommended for voice audio types like podcasts, etc. Voice Activated Recording Voice Activated Recording starts when audio is received, such as when you speak into the microphone, and pauses whenever there is silence. The level that is needed to start recording is the Silence Threshold. The recording will pause when the level falls 4dB below the Silence Threshold. The Silence Threshold can be set in WavePad Options on the Recording tab. On this tab, in the section Automatic Recording, you can select Voice Activated Recording, Set the delay in seconds before recording is deactivated when silence is detected and set the Silence Threshold. We recommend starting with the default settings to test your recording environment. Depending on the level of background noise and the sensitivity of your microphone, you will need to increase or decrease the Silence Threshold. You want the Silence Threshold to be high enough that it does not record only background noise, but low enough that it will always start recording when you begin speaking. Standby / Levels The Levels button on the Record tab, places record on standby while you adjust your volume levels prior to starting your recording. Set your recording device to a suitable setting using the volume mixer or adjust the position of the microphone while speaking and watching the level display. The level display on the bottom right of your WavePad window will display the level of audio being received from your audio device and is black when there is no audio being received. You do not want your levels to go above 0dB because your audio will be clipped and distorted, which lowers the quality of your recording. When you are happy with your levels, press the record button to begin your recording. For professional grade microphones recommended for use with WavePad, see WavePad Recommended Microphones. Listen while Recording To enable listening while recording, please follow these steps: For Windows 7 and above: 1. Open Recording Settings for your computer. (You can open this by pressing the Windows+R key combination to open the Run box, and type mmsys.cpl. When Sound control appears, press Recording tab.) 2. Right-click on Microphone and select Properties. 3. Select the Listen tab. 4. Select the checkbox next to Listen to this device. 5. Click Apply button For Windows XP and Vista: 1. Open Volume Settings for your computer. (You can open this by pressing the Windows+R key combination to open the Run box, and type sndvol32.exe) 2. For Microphone / Line In / Input Monitor options, uncheck mute and set volume up. (If options are not present, go to Options menu and select Properties. Select Playback and make sure their checkboxes are selected) |